It all started with a simple idea – creating a my first standing shelf to help me organize my space while adding a personal touch to my home. After browsing through design ideas, and a failed attempt at a prototype, I settled on something minimal but sturdy, with three levels for books, plants, and various manipulations.
I chose pine wood as my material. Not only is it affordable, but it also gives off a nice, rustic feel when finished. I started by selecting the pieces I would need: one large slab of pine wood for the shelves and four pieces to create the frame. I also made sure to get some wooden dowels to join the panels together.
The process began with cutting the pine panels to size. I measured each shelf carefully, making sure they would fit well in the space I had in mind. With my trusty saw, I cut the panels, then sanded them down until they were smooth and ready for assembly.
The next step was to create the frame. I wanted the shelf to be stable, so I opted for a wooden frame made of four pieces. Using a combination of wood glue and wooden dowels, I joined the frame pieces together. The dowels ensured a strong connection, while the wood glue provided extra stability.
For the shelves, I decided to use a panel-joint technique where the larger pine wood panels were glued together. This allowed me to create wider shelves that could hold more weight. The glue was applied generously, and I made sure everything was lined up properly before clamping the pieces together to set.
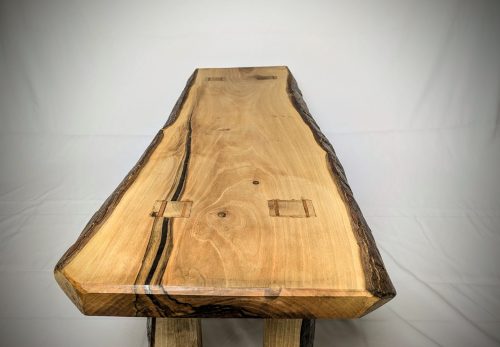
Once the frame was assembled and the shelves were securely glued, I started the final touches. I added a coat of wood finish to enhance the natural beauty of the pine. The grain of the wood really popped, and the light golden color gave it an inviting, warm look.
After a few hours of waiting for everything to dry and settle, it was finally time to assemble the shelf. I carefully placed the shelves inside the frame, securing them with wedges and glue to ensure everything was held firmly.
It was time for the finishing touch. Whenever I work with wood, I like to use natural wood protection products and avoid varnishes. So I coated the wood with ‘OLI-NATURA Linseed Oil Varnish, Organic Wood Protection’ which I found at a local dealer. Now the shelves have a great shine and have ennobled the space. Then I let the whole structure dry overnight, making sure it was rock solid.
However, when I placed it against the wall, I noticed that the legs were not aligned and that one side was tilted and not flat.
So to solve this problem and to level it accurately, I ordered 4 Adjustable Leg Levelers for Cabinets. By turning a screw, each leg can be individually leveled and the shelf can be adjusted to sit securely on the floor.
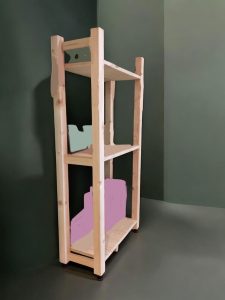
My First Standing Shelf
The moment of truth came when I stood the shelf upright for the first time. It stood tall and proud, looking exactly as I had imagined. I was so proud of what I’d created—a custom, handmade shelf that was not only functional but also a work of art.
Now, every time I look at that ‘My First Standing Shelf’, I can’t help but feel a sense of accomplishment. It’s more than just a piece of furniture—it’s a reminder of the effort and care I put into making my first piece of furniture. And every time I add a new book or plant to it, I’m reminded that sometimes the best things are the ones you make yourself.

Leave A Comment